blogs
生成自签名证书
发布于: 2018-11-06
自签名证书可以在本地、CI环境使用https协议以及http2协议。本文主要梳理下生成自签名证书的流程和命令,同时介绍nodejs和Nginx的配置。
一、生成自签名证书
生成证书,主要用到 openssl 命令。具体步骤如下:
- 生成私钥
openssl genrsa -out cert.key
生成RSA私钥文件 cert.key,默认秘钥长度是2048位。
- 生成证书请求文件
openssl req -new -key cert.key -out cert.csr
根据私钥文件生成证书请求文件 cert.csr。这个过程需要录入以下信息,可以随便填写。
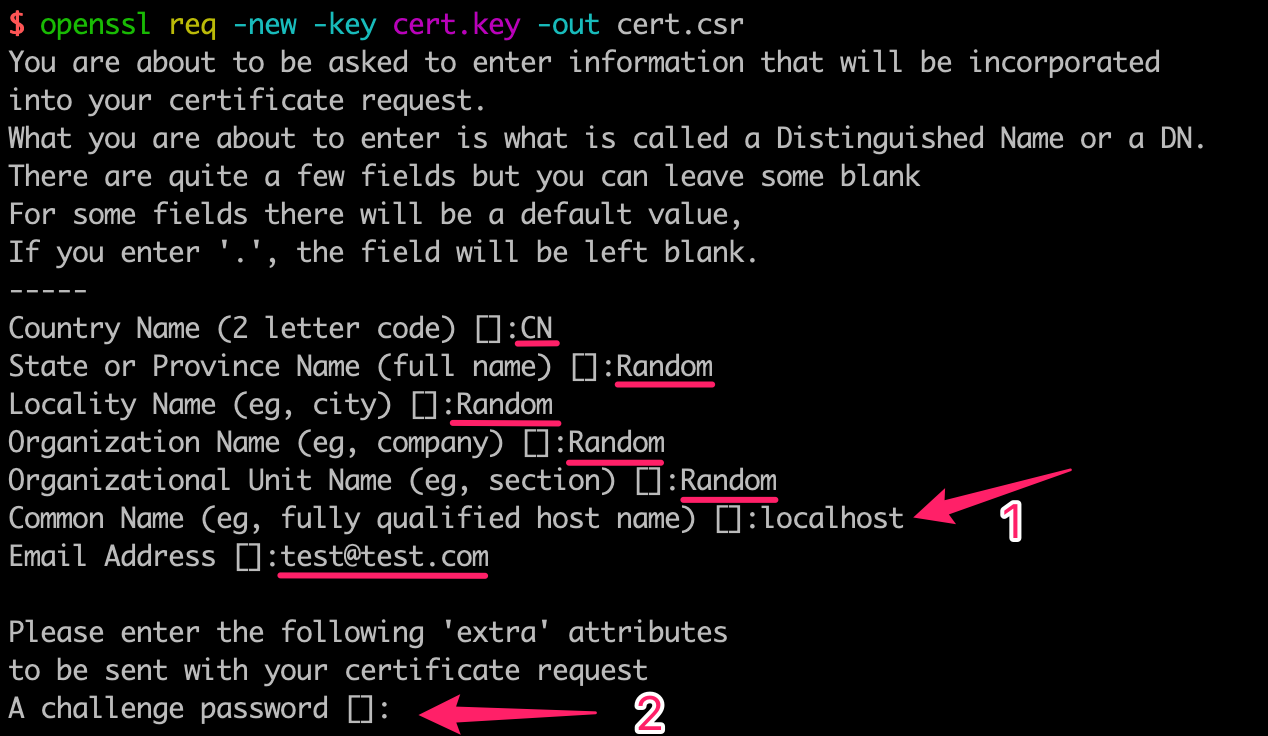
需要特别注意注意两处:
-
「重点」
Common Name(eg, ...) []:,这里需要输入站点的 host name。这里是本地环境输入 localhost。 -
A challenge password [],这里我们不需要输入密码,直接点击 Enter 键完成。
- 生成自签名证书
openssl x509 -req -days 365 -in cert.csr -signkey cert.key -out cert.crt
生成x509证书文件 cert.crt,有效为365天。然而,如果使用这个证书文件 cert.crt,最新的Chrome浏览器会告警站点不安全。
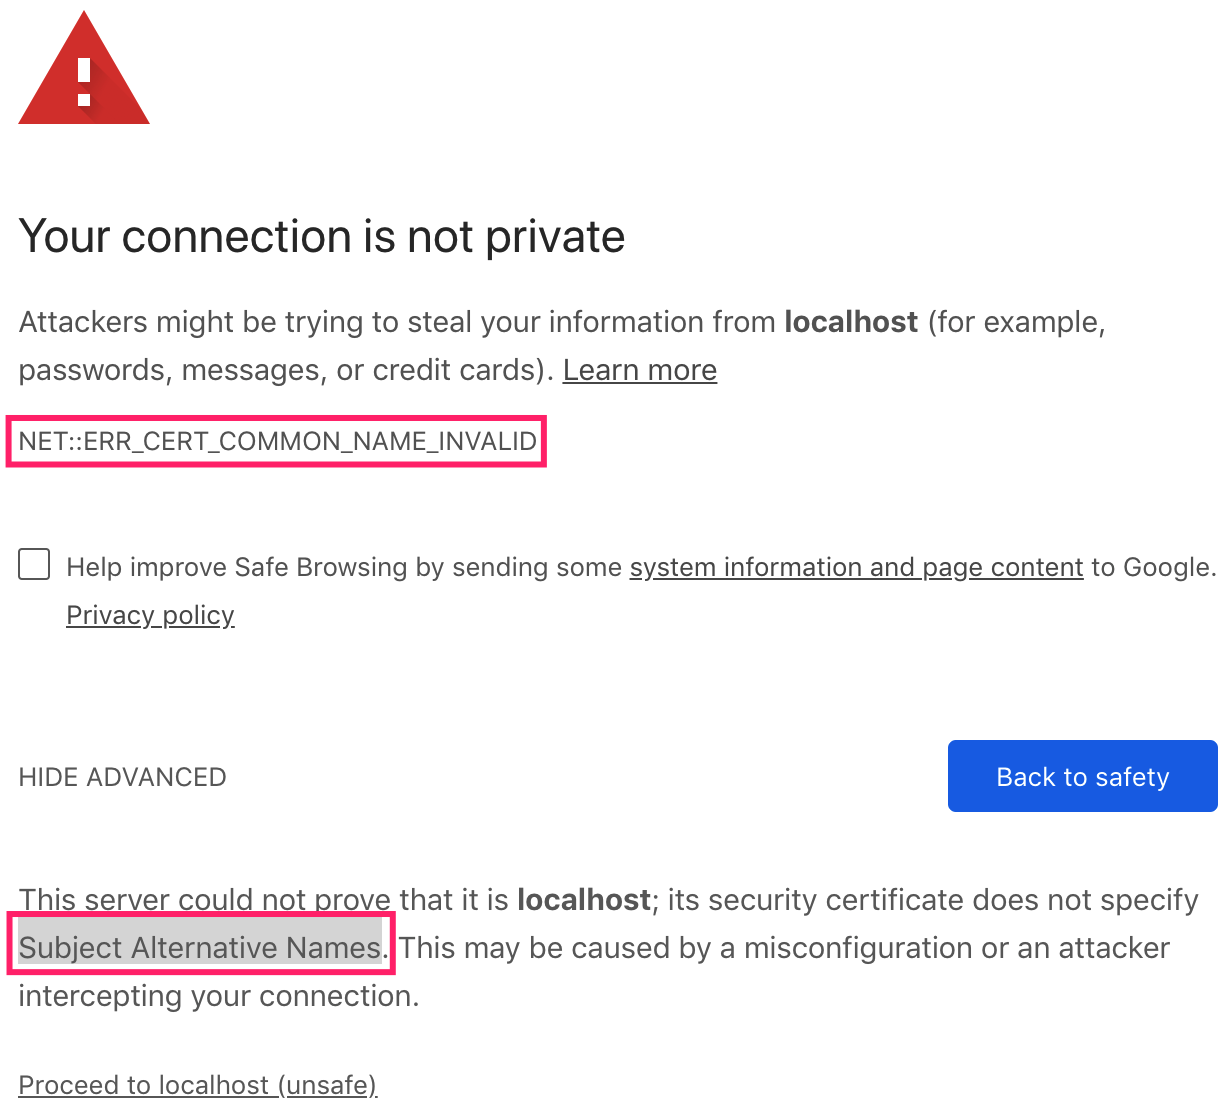
证书文件里还需要添加 Subject Alternative Names 信息。
- 添加 subjectAltName 信息
openssl x509 -req -extfile <(printf "subjectAltName=DNS:localhost") -days 365 -in cert.csr -CA cert.crt -CAkey cert.key -CAcreateserial -out cert.crt
重新签名,添加 subjectAltName 信息,覆盖源文件 cert.crt。
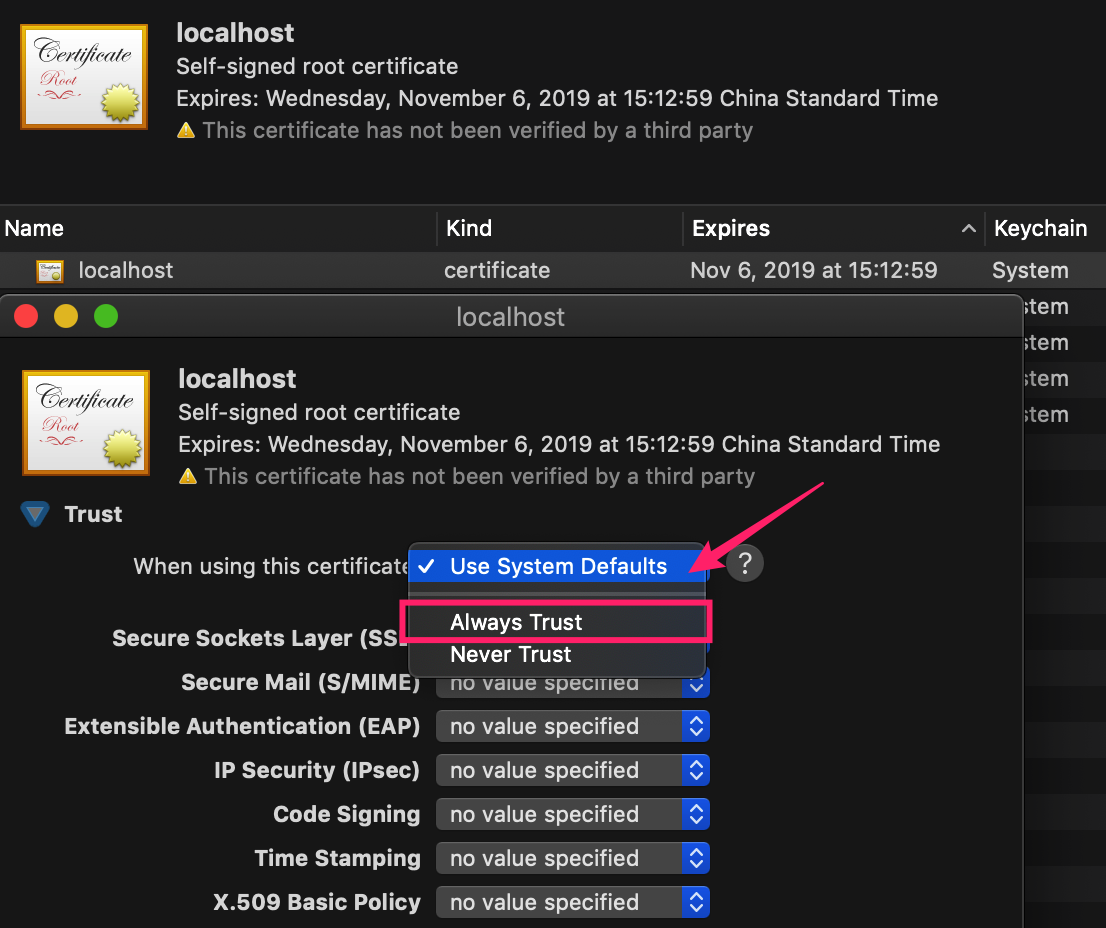
- 添加证书到系统 (MacOS)
使用系统应用 keychain Access 导入 cert.crt文件,将该证书设置为授信证书。如下图,
以上步骤会生成:cert.crt, cert.csr, cert.key, cert.srl 四个文件。接下来主要会用到 .crt 和 .key 文件。
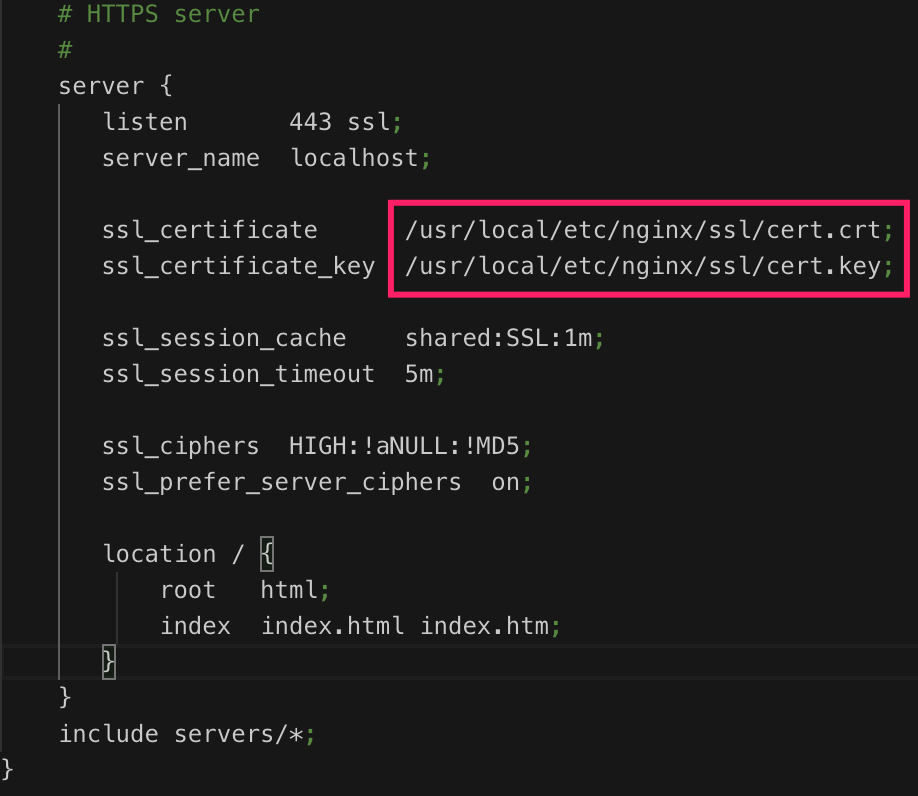
二、Nginx 启用https
复制 cert.crt 和 cert.key 文件到任意目录 /usr/local/etc/nginx/ssl/。在 Nginx 配置文件 nginx.conf里,设置 ssl_certificate 和 ssl_certificate_key 两个值,启动 nginx,访问 https://localhost/ 便能看到 nginx 的欢迎页面。
三、Node.js启用https
创建 https-server.js文件
const https = require('https');
const fs = require('fs');

const ssl_option = {
  key: fs.readFileSync('cert.key'),
  cert: fs.readFileSync('cert.crt')
};

const server = https.Server(ssl_option, (req, res) => {
  res.writeHead(200, { "Content-Type": "text/plain" });
  res.end("hello world");
});

server.listen({port: 443}, () => console.log("https://localhost/"));
将生成的 cert.key 和 cert.crt放到同级目录下,使用 sudo node https-server.js 命令启动服务。访问 https://localhost/ 便能看到 hello world 信息。
四、自定义域名
以上都在本地环境访问 https://localhost/ 地址看到结果。如果访问自定义域名,需要修改系统hosts文件,同时在生成证书文件时填入相应的host name。
例如,最终访问自定义域名 https://dev.local.me/ 。
- 修改hosts文件
在 /etc/hots 文件追加一行
127.0.0.1 dev.local.me
- 修改 Common Name 和 Subject Alternative Names 值
在第二步「生成证书请求文件」,录入 Common Name(eg, ...) []: 信息为 dev.local.me。
在第四步「重新签名,添加 subjectAltName 信息」的命令信息 "subjectAltName=DNS:localhost" 改为 "subjectAltName=DNS:dev.local.me"
生成证书文件的其余步骤保持不变。
对与Nginx,需要修改nginx.conf文件的 server_name 为dev.local.me。
对于Node.js,需要修改设置 host 属性值
server.listen({
  port: 443,
  host: 'dev.local.me'
}, () => console.log("https://dev.local.me"));
参考
- 笔记:OpenSSL 生成「自签名」证书遇到的 missing_subjectAltName 问题
- Chrome had deprecated support for commonName matching in certificates
- How to get HTTPS working on your local development environment in 5 minutes
- https://github.com/dakshshah96/local-cert-generator
- 给Nginx配置一个自签名的SSL证书